Introduction
In this guide, you’ll learn how to add digest functionality to email notifications. But before exploring the actual code, let’s understand what a digest notification is and how it works. You can find the entire code(frontend as well as backend) for this app here.If, instead, you want to add digest to in-app notifications, we have a guide for that as well. Take a look here.
What is a Digest Notification?
Often when you associate notifications with user activity, the end user can be bombarded with messages because of the nature of the activity. Take for example the case of commenting in the context of a social media app. If you were to send a notification to a user for every comment they receive, and they happen to receive 100 comments, it could lead to user fatigue since you would have to send 100 messages. This is where digest notifications come into the picture! A digest notification is a notification that consolidates information from several notifications into one and delivers that notification to the end user instead of several separate messages.How does Digest Notification Work?
Novu has a built-in digest engine that collects multiple trigger events, aggregates them into a single message, and delivers it to the subscriber. You can use the digest engine by adding a ‘digest node’ to your workflow in the workflow editor in the Novu dashboard. If you want to learn more about it, this is a great place to start. Let’s see it in action now!Add Digest Notification To An App
To get started with this, you need the following:- A Novu account. Sign up for free if you don’t have one yet.
- A working React development environment.
Workflow setup in Novu
Once, you have these, follow the steps below:- Head over to the Novu Dashboard.
- Click
Workflowson the left sidebar of your Novu dashboard. - Click the
Create Workflowbutton on the top right:

create workflow button, you’ll see a dropdown. Select blank workflow from the dropdown:

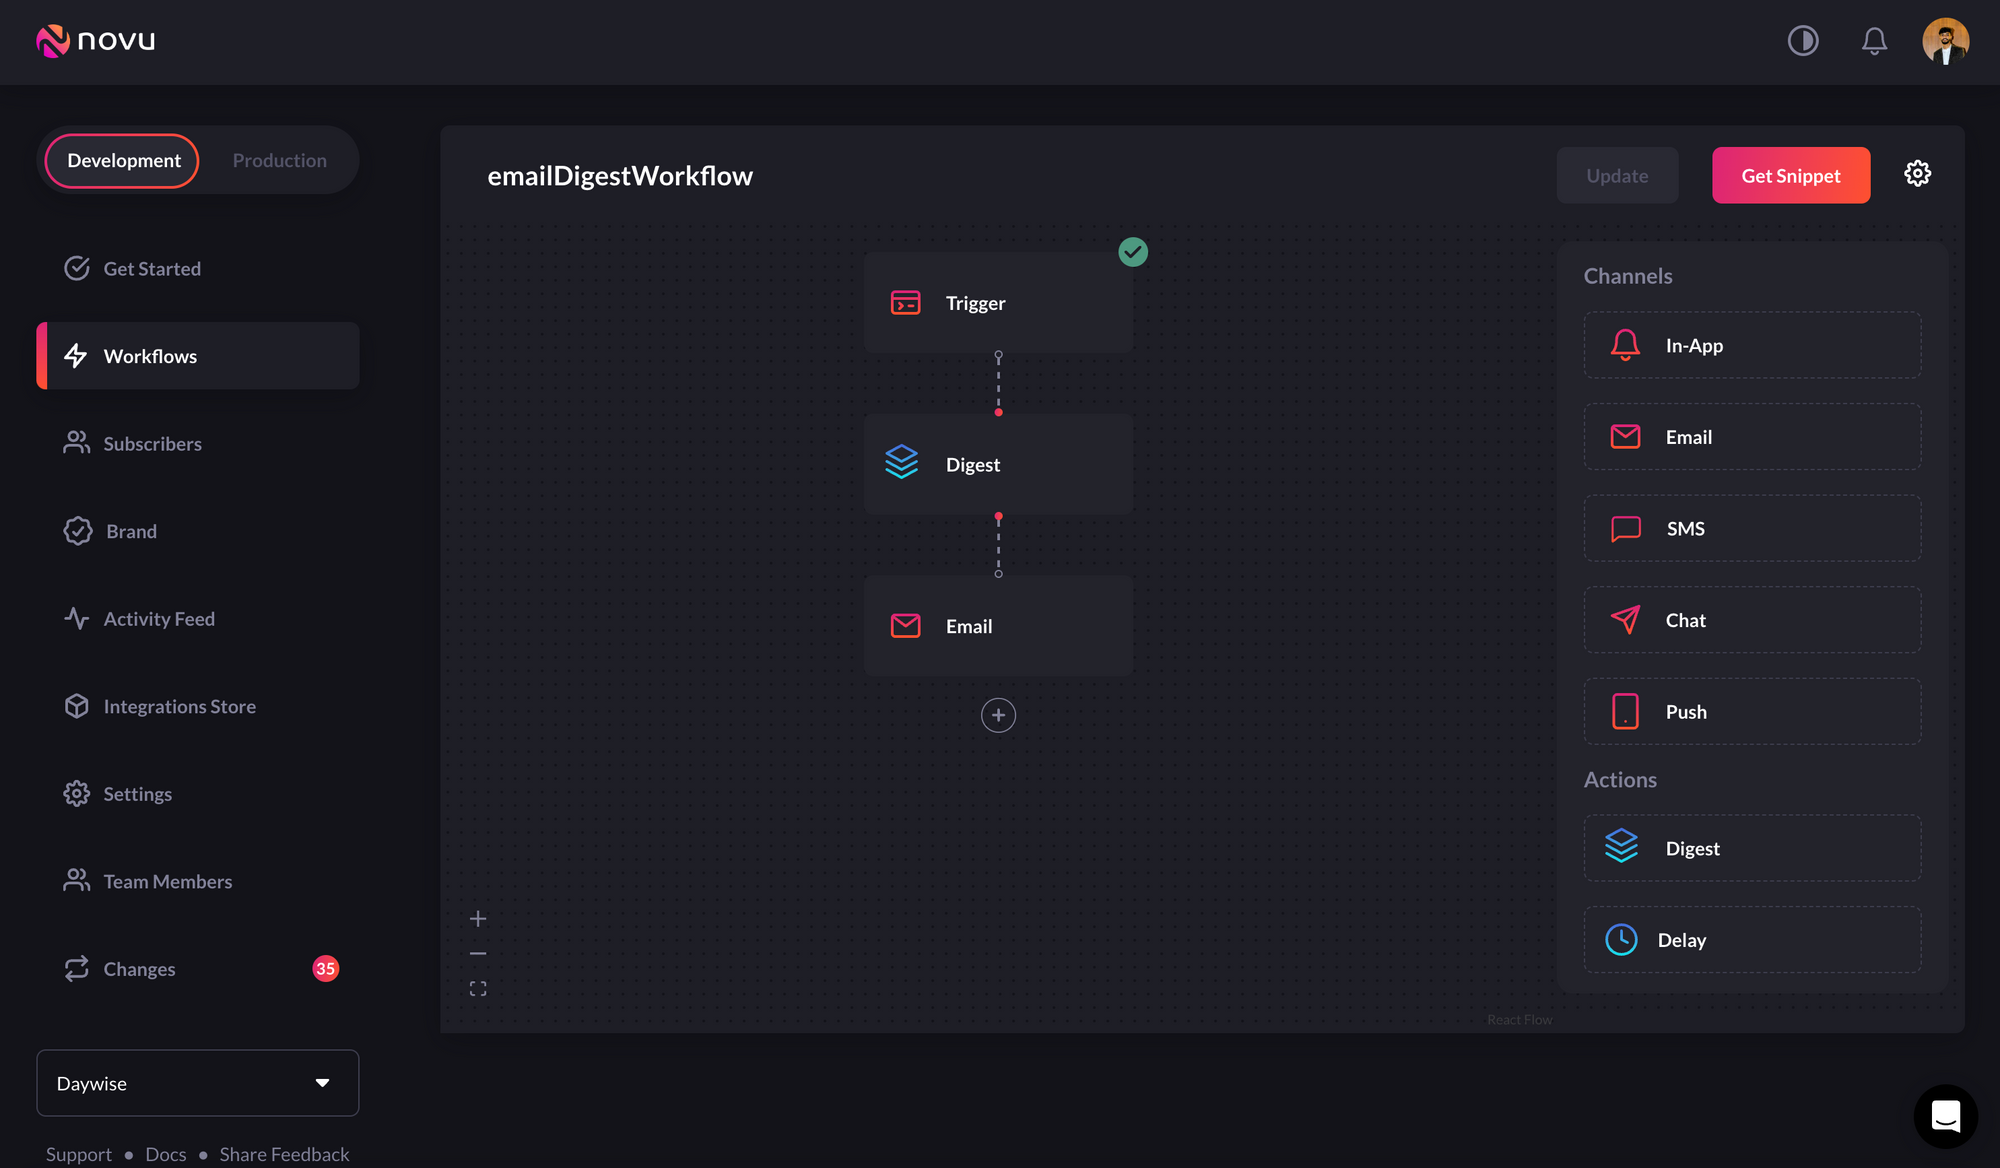
Email channel. You’ll also see the Digest action on the right sidebar.
Each node that is added below the digest node will only be triggered after the specified time interval
digest action below the trigger node, and add the email channel node below the digest node as shown below:
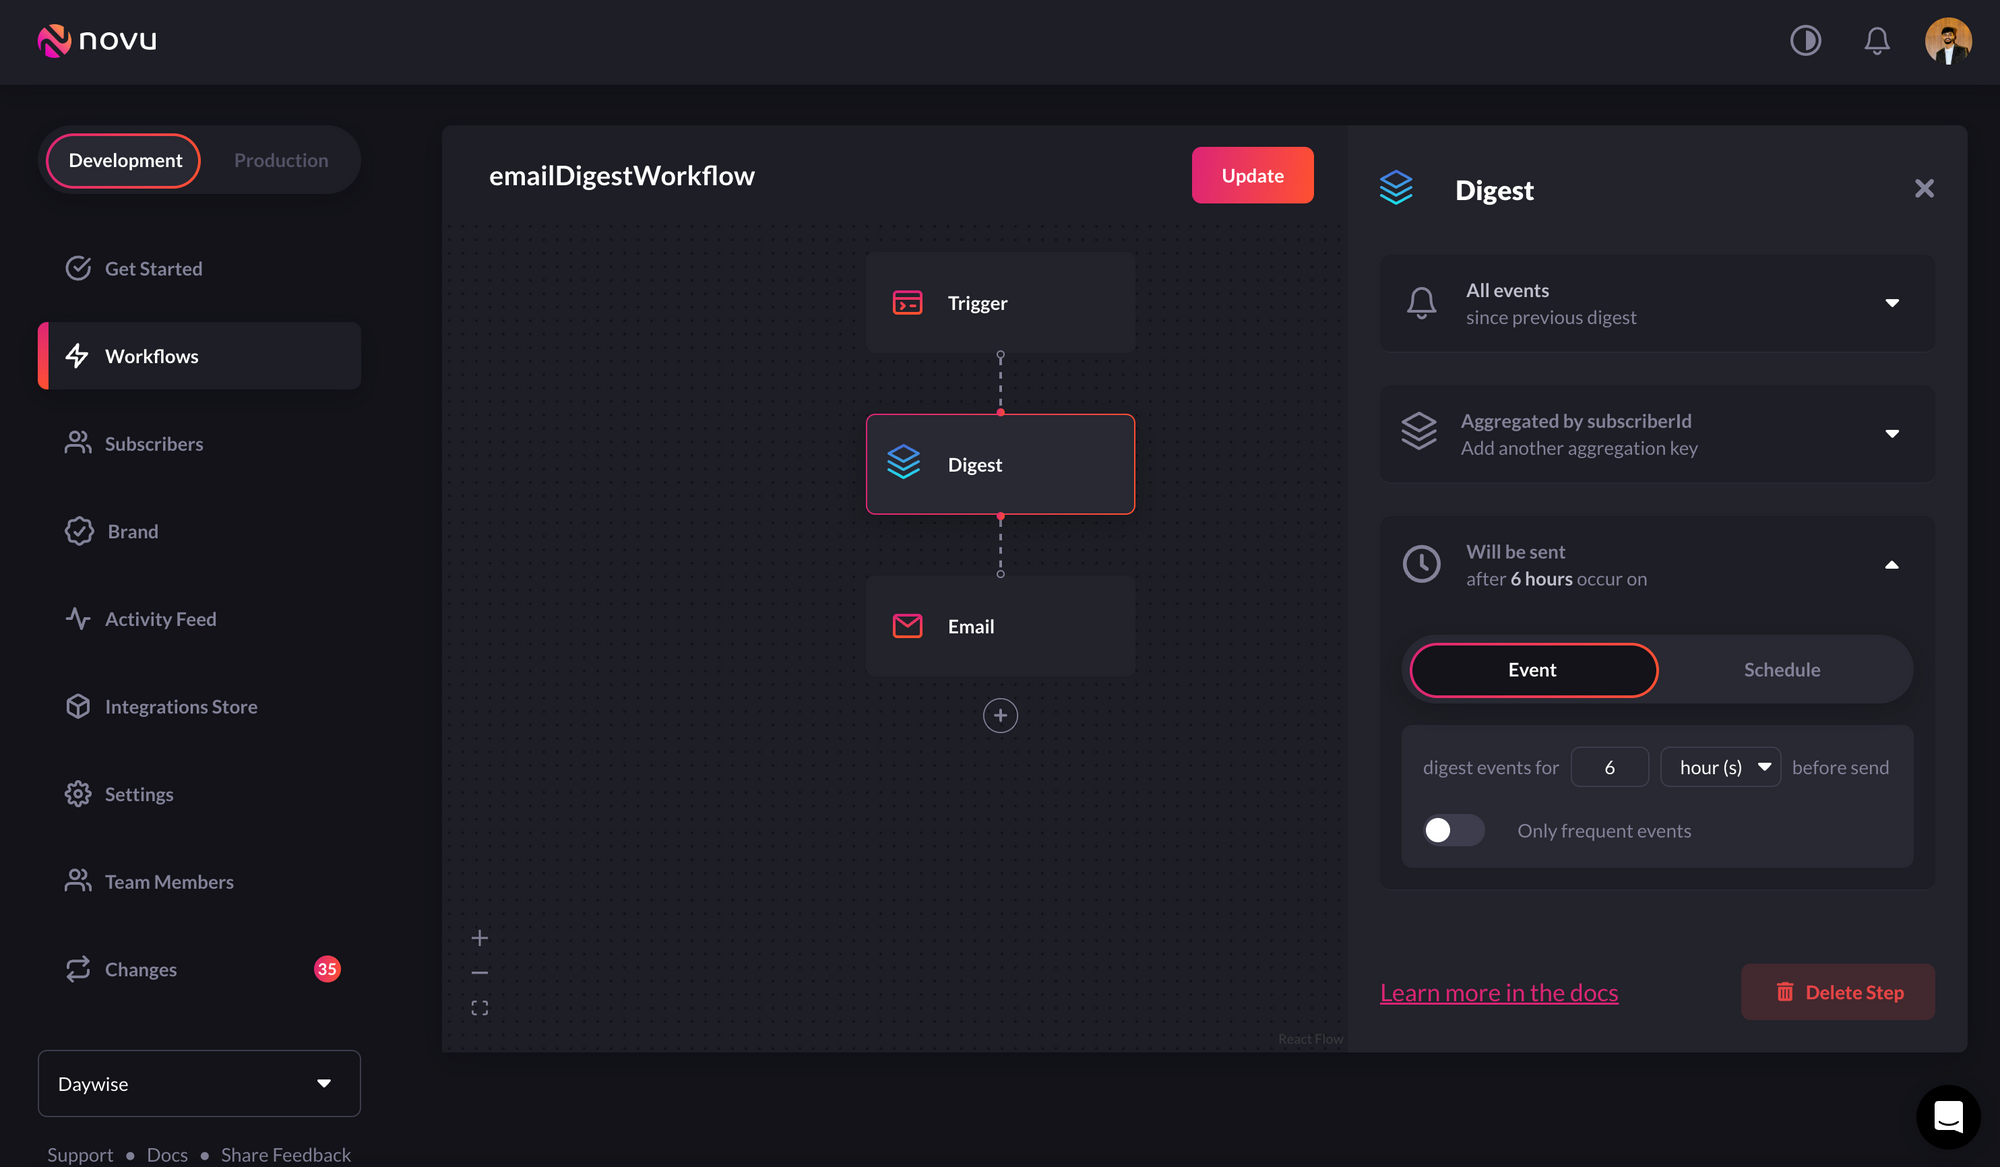
digest node allows you to set a specific time interval for when notifications should be sent:
email channel as per your need:
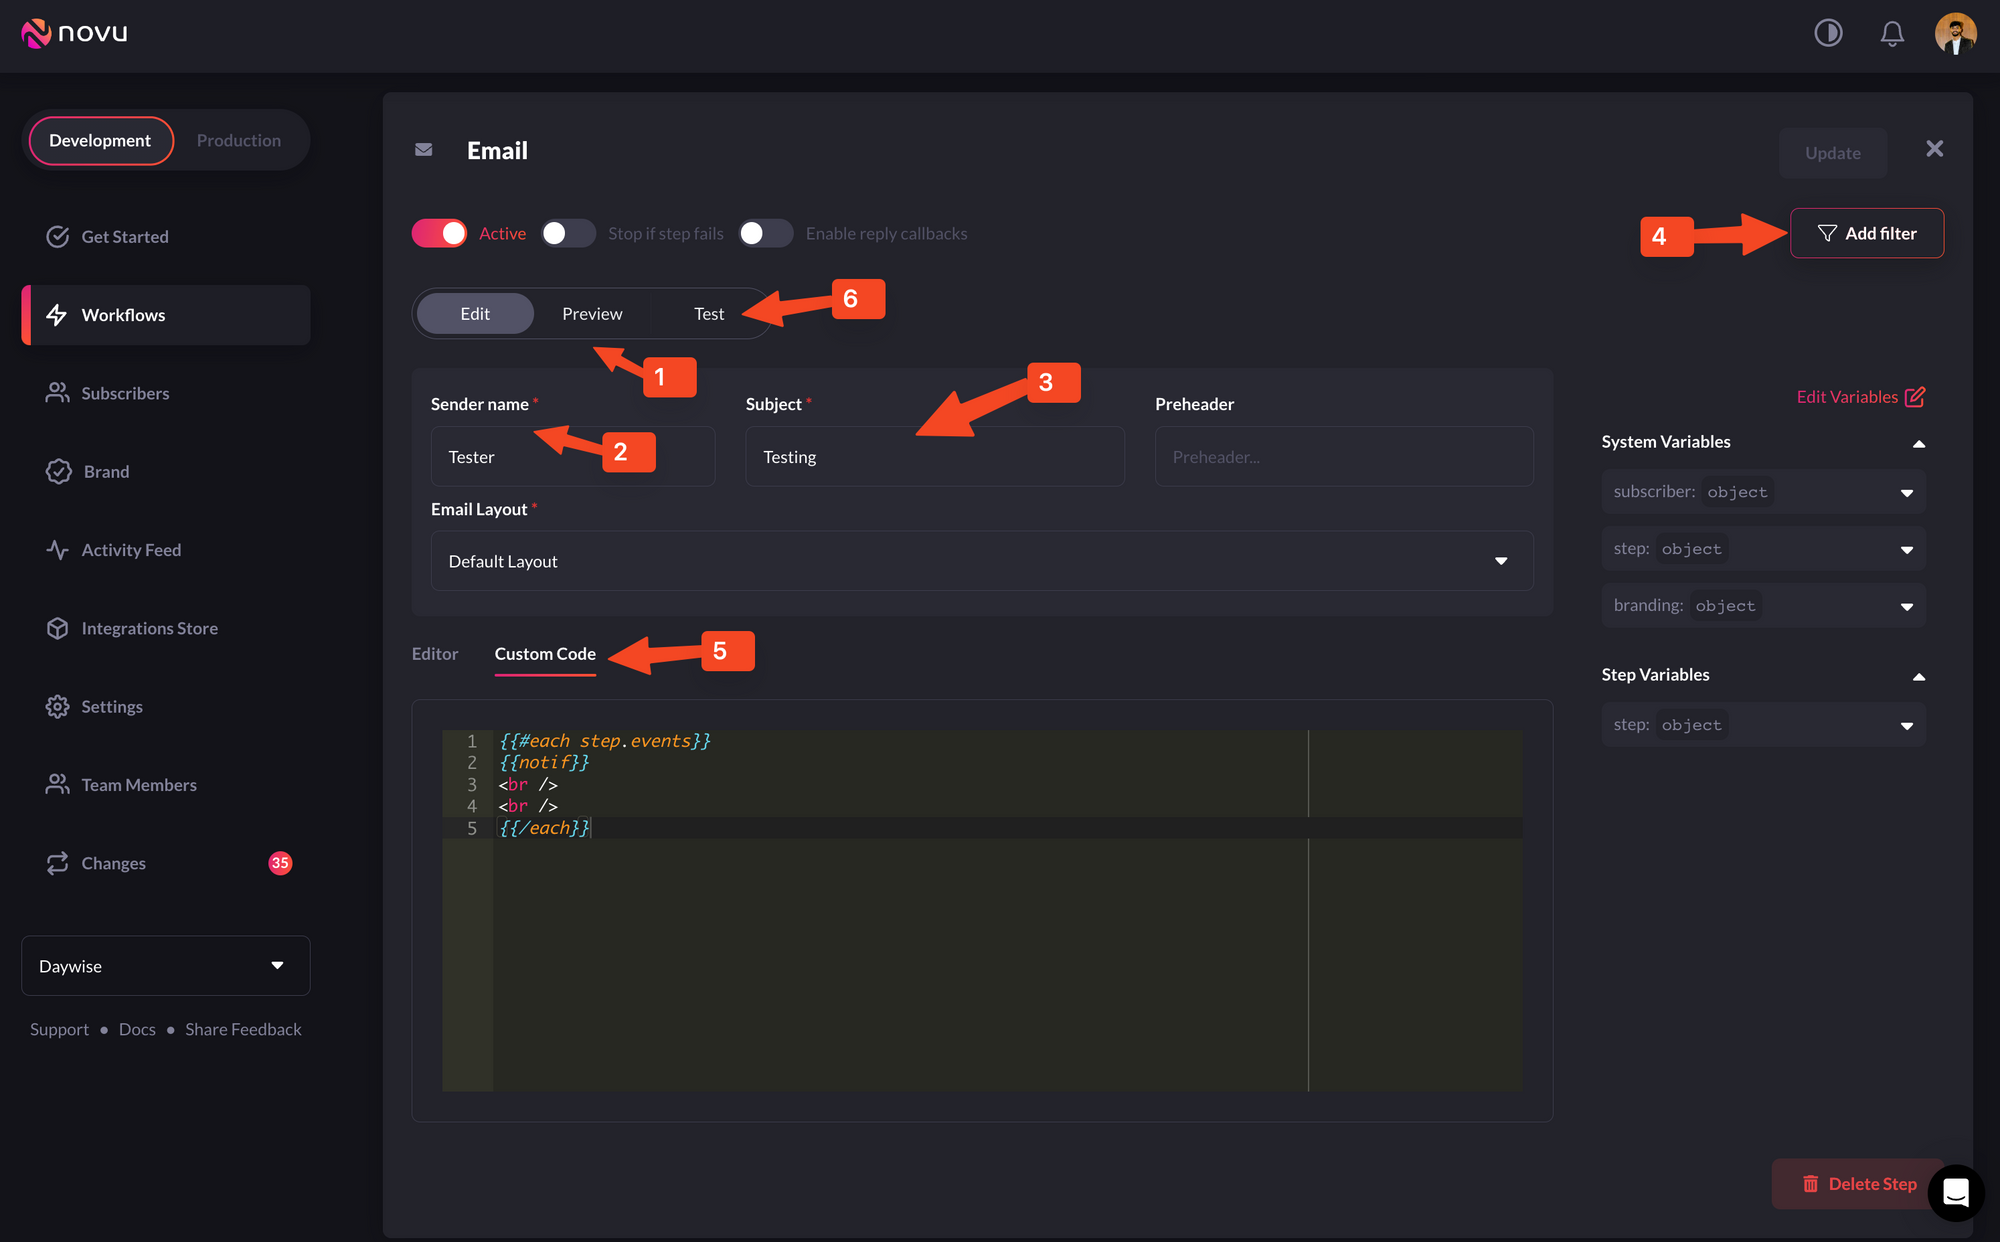
- 1-Preview: This shows you a glimpse of what the email notification item will look like when delivered to the client.
- 2-Sender Name: Lets you set the sender name for emails that the client will receive.
- 3-Subject: This lets you define the subject line for the emails that the client will receive.
- 4-Filter: This feature allows you to configure the criteria for delivering notifications. For instance, you can apply a filter based on a subscriber’s online status to send them an email if they were online within the last hour.
- 5-Custom Code - In custom code, you can write custom digest templates to show some/all parts of a message.
- 6-Test - This allows you to send a test email to test if everything is working as per your wish.
update button on the top right.
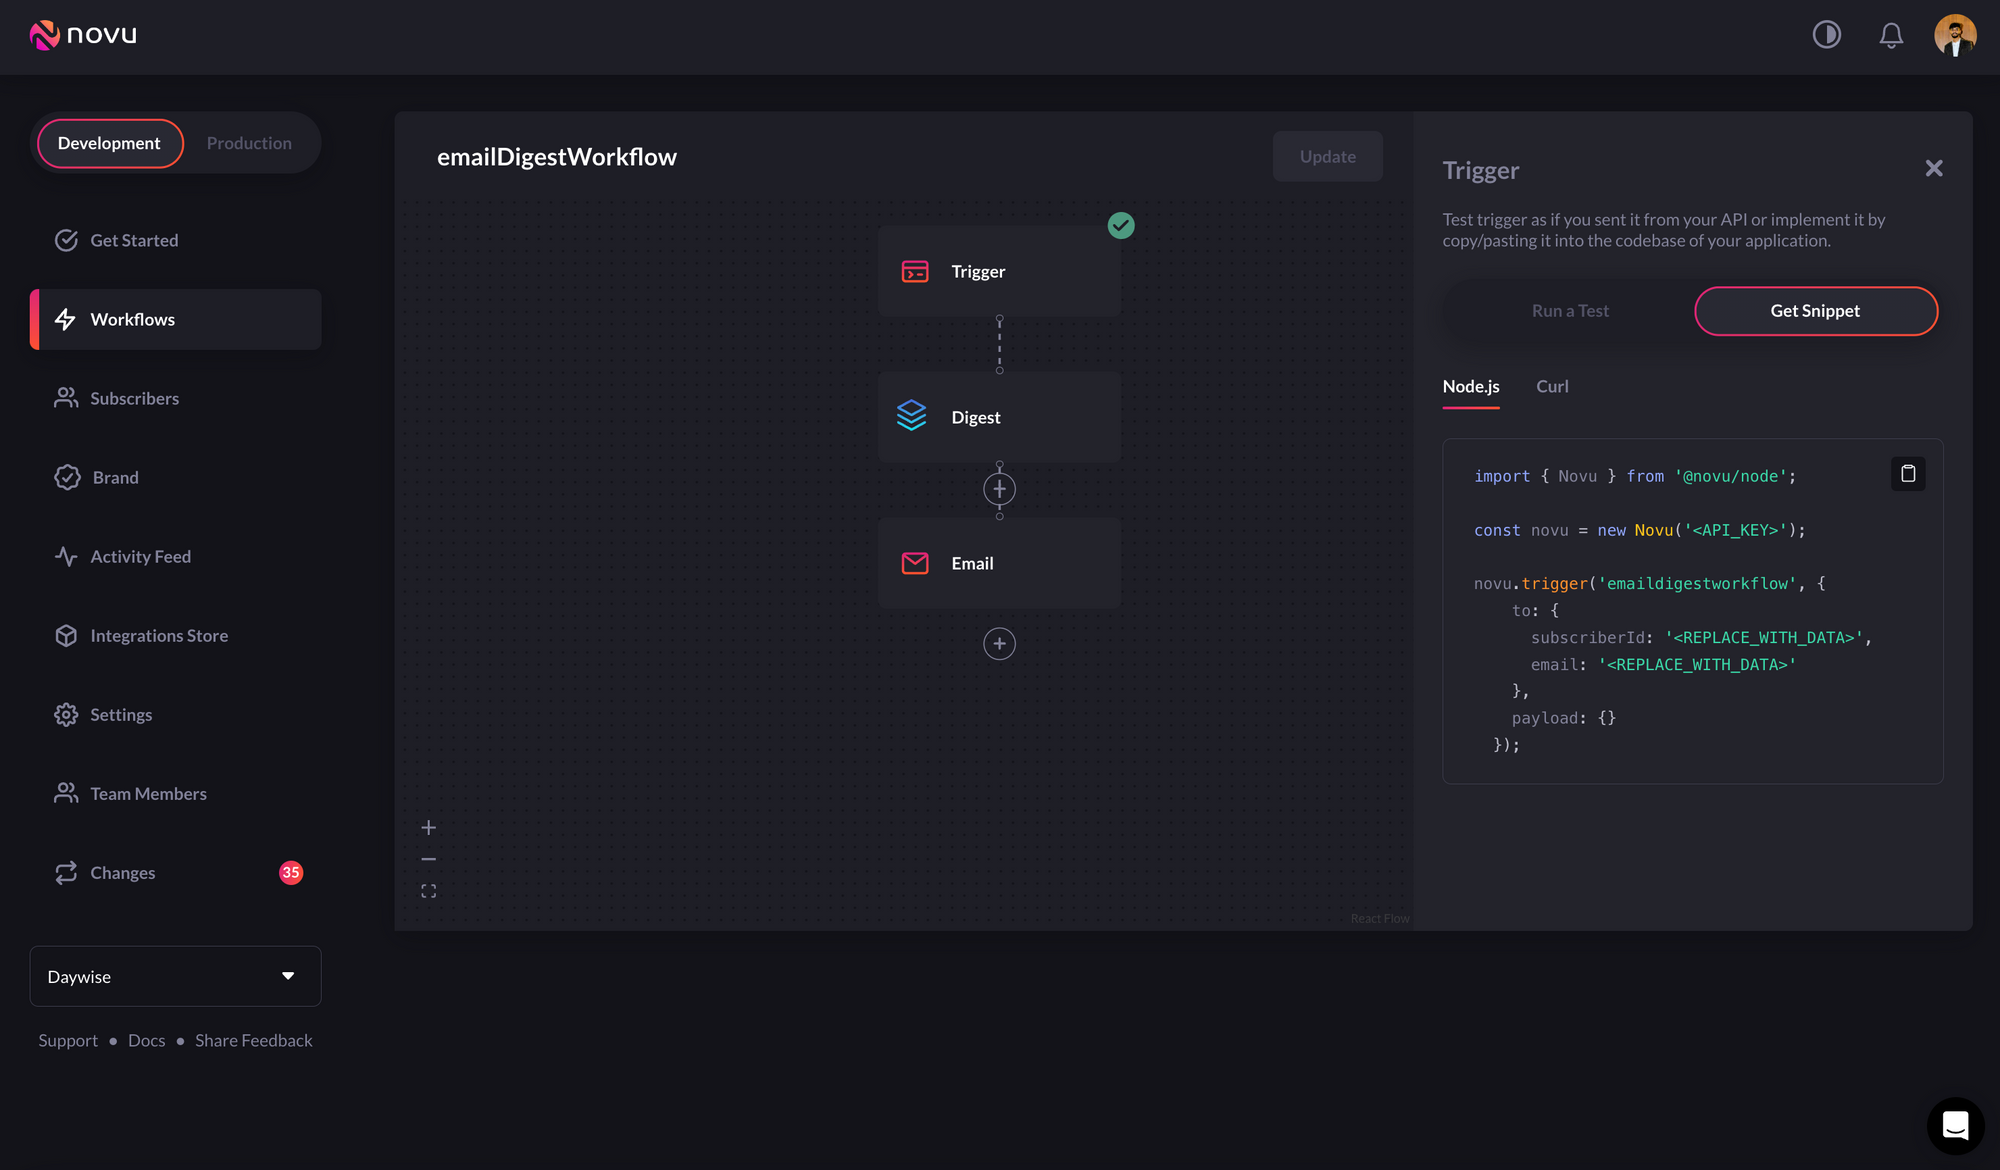
It’ll automatically create a trigger code that you can use in your app. To get it, click on the get snippet button on the top right and copy it:
Add Novu to the Backend and Configure it
In your backend, install the novu package using the following code:novu.js, in our case) and the trigger function is getting called in the controller function above by the name getEmailDigest.
If you’re following the guide, you’ve already copied the trigger function. But before we can add it to our app, we need one key thing - Subscribers.
Subscribers are users to which the notifications are sent. You can see a list of subscribers in the Novu dashboard as well.
In our app, we’ll create a subscriber in Node.js as we’re writing our backend in Node.js, but we also have backend SDKs (Node.js, PHP, .NET, Elixir, Go, Ruby, Python, and Kotlin) to choose from. The recommended way to create a subscriber in NodeJS is as follows:
subscriberID of digestEmailSub. In most real-world scenarios, the subscriberId should be an alphanumeric entity like adfa67y87ad0. You can read more about subscribers here.
Back in our app, we can now add the trigger function:
Hit the backend route from the front end
From the front end, we just need to hit the route we had defined above. Below, I’m sharing the body component of the demo app I created to illustrate this: