Requirements
To follow the steps in this quickstart, you’ll need:- A Novu account. Sign up for free if you don’t have one yet.
- A working Vanilla JS development environment.
Loading Notification center component from the CDN
The Notification Center Web Component is a custom element that can be used in any web application. You can find out more about the web component here. In our case, we’ll be using the bundled version of the Notification Center Web Component that is available on the CDN. You can load the Notification center component using the CDN as follows:application-identifier and subscriber-id.
An application identifier is a public key used to identify your application. You can get your own application identifier from the Novu dashboard settings.
And subscribers are users to which notifications will be sent. They are identified by a subscriberID which you can also find in the Novu subscribers dashboard. Let’s learn more about subscribers.
Subscribers in Novu
If you click “Subscriber” on the left sidebar of the Novu dashboard, you’ll see the subscriber list. By default, there will only be one subscriber as you’re automatically added as a subscriber when you sign up for Novu:
subscriberId.
With Novu, you can create a subscriber using any of its SDKs (Node.js, PHP, .NET, Go, Ruby, Python and Kotlin). The code to create a subscriber in Novu is:
<NOVU_API_KEY> with it. Now, if you’ll go to the Novu dashboard, you shall see the subscriber we created above with subscriberId of 123.
You can also update information about an already existing subscriber using the subscriber.update method as shown below:
Create a workflow
Before triggering a notification, we need to create a workflow. A workflow is like a blueprint that all the notifications are supposed to follow.The recipients of a triggered notification are called subscribers.The workflow includes the following:
- Workflow name and Identifier
- Channel tailored content:
| Channel | Content Style | Custom Variables{{handlebars}} format |
|---|---|---|
| HTML | ✅ | |
| Visual Editor | ✅ | |
| SMS | Text | ✅ |
| Chat | Text | ✅ |
| In-App | Text | ✅ |
| Push | Text | ✅ |
- Click Workflows on the left sidebar of your Novu dashboard.
- Click the “Create Workflow” button on the top right.
- The name of the new workflow is currently “Untitled”. Rename it to a more suitable title.
- Select “In-App” as the channel you want to add.
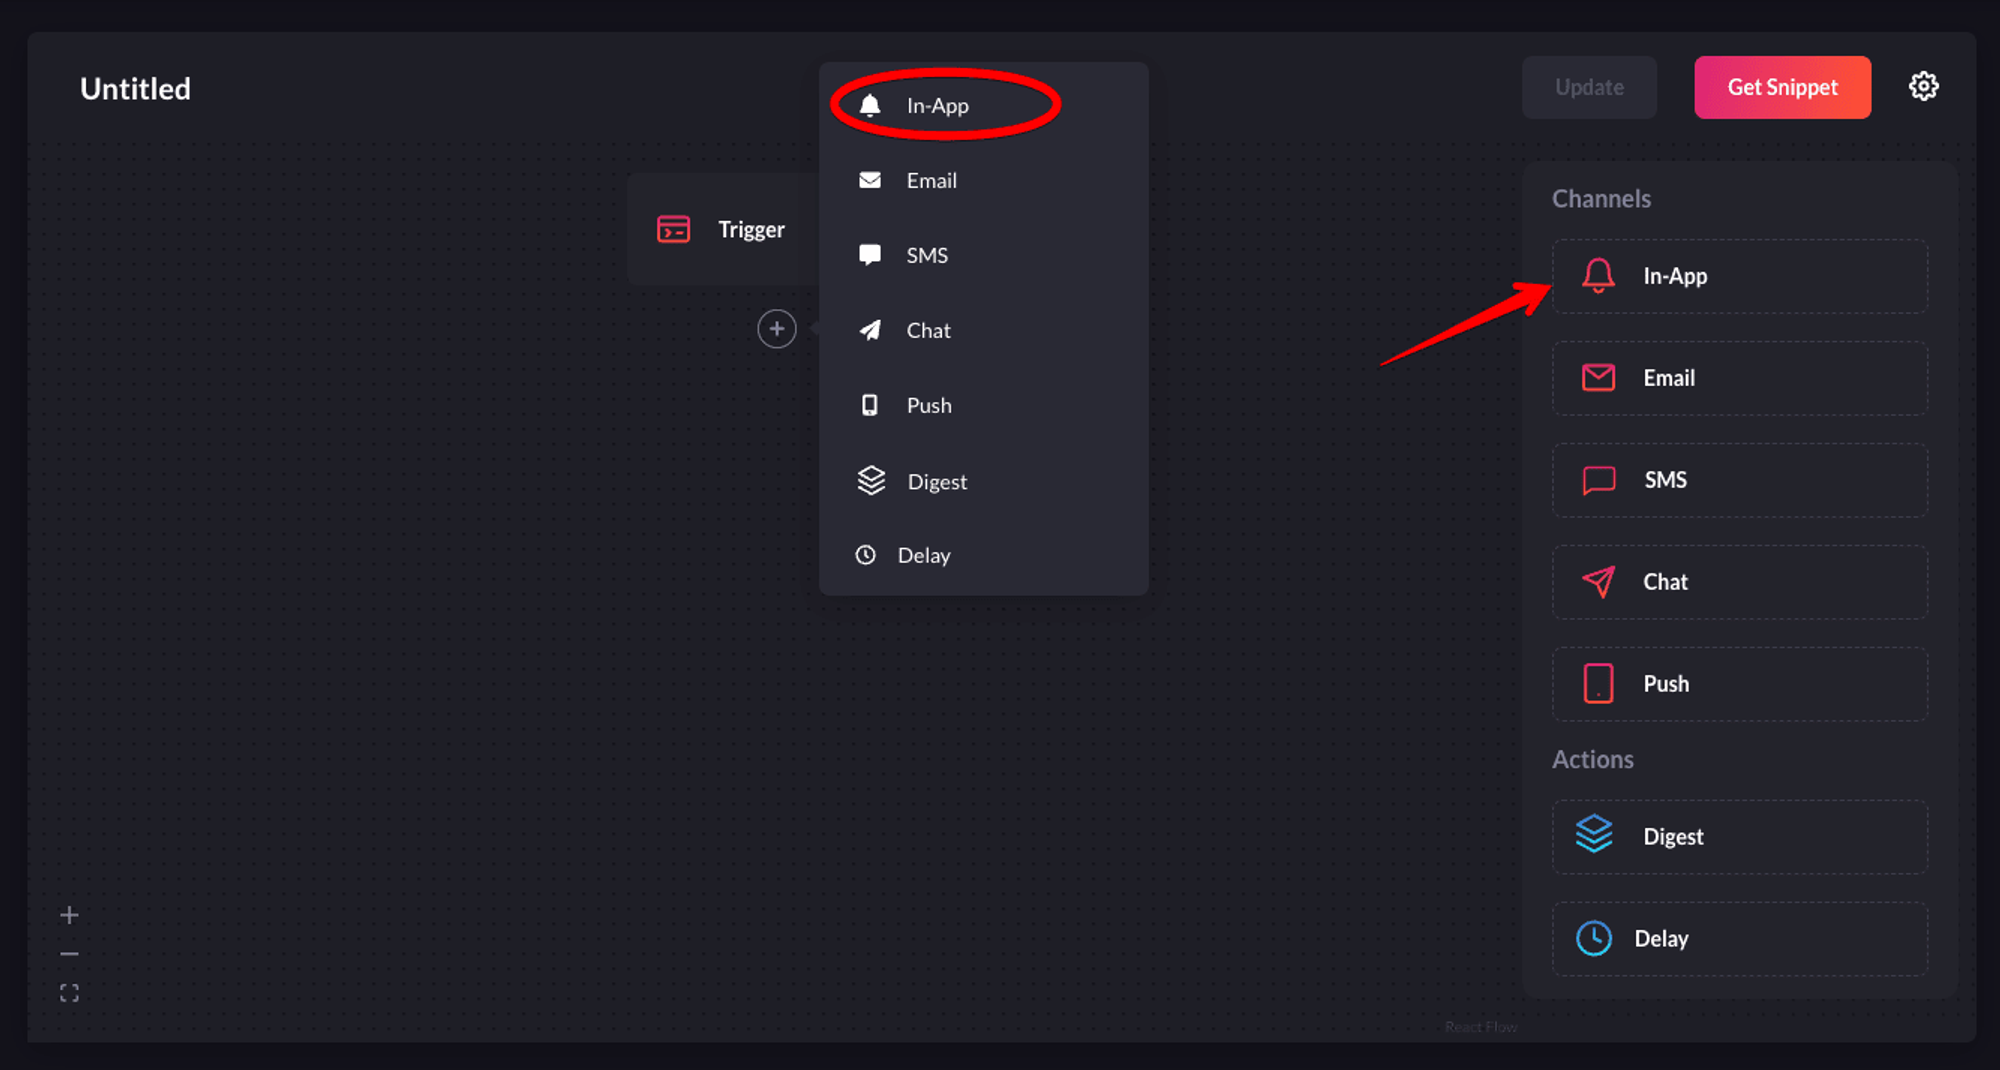
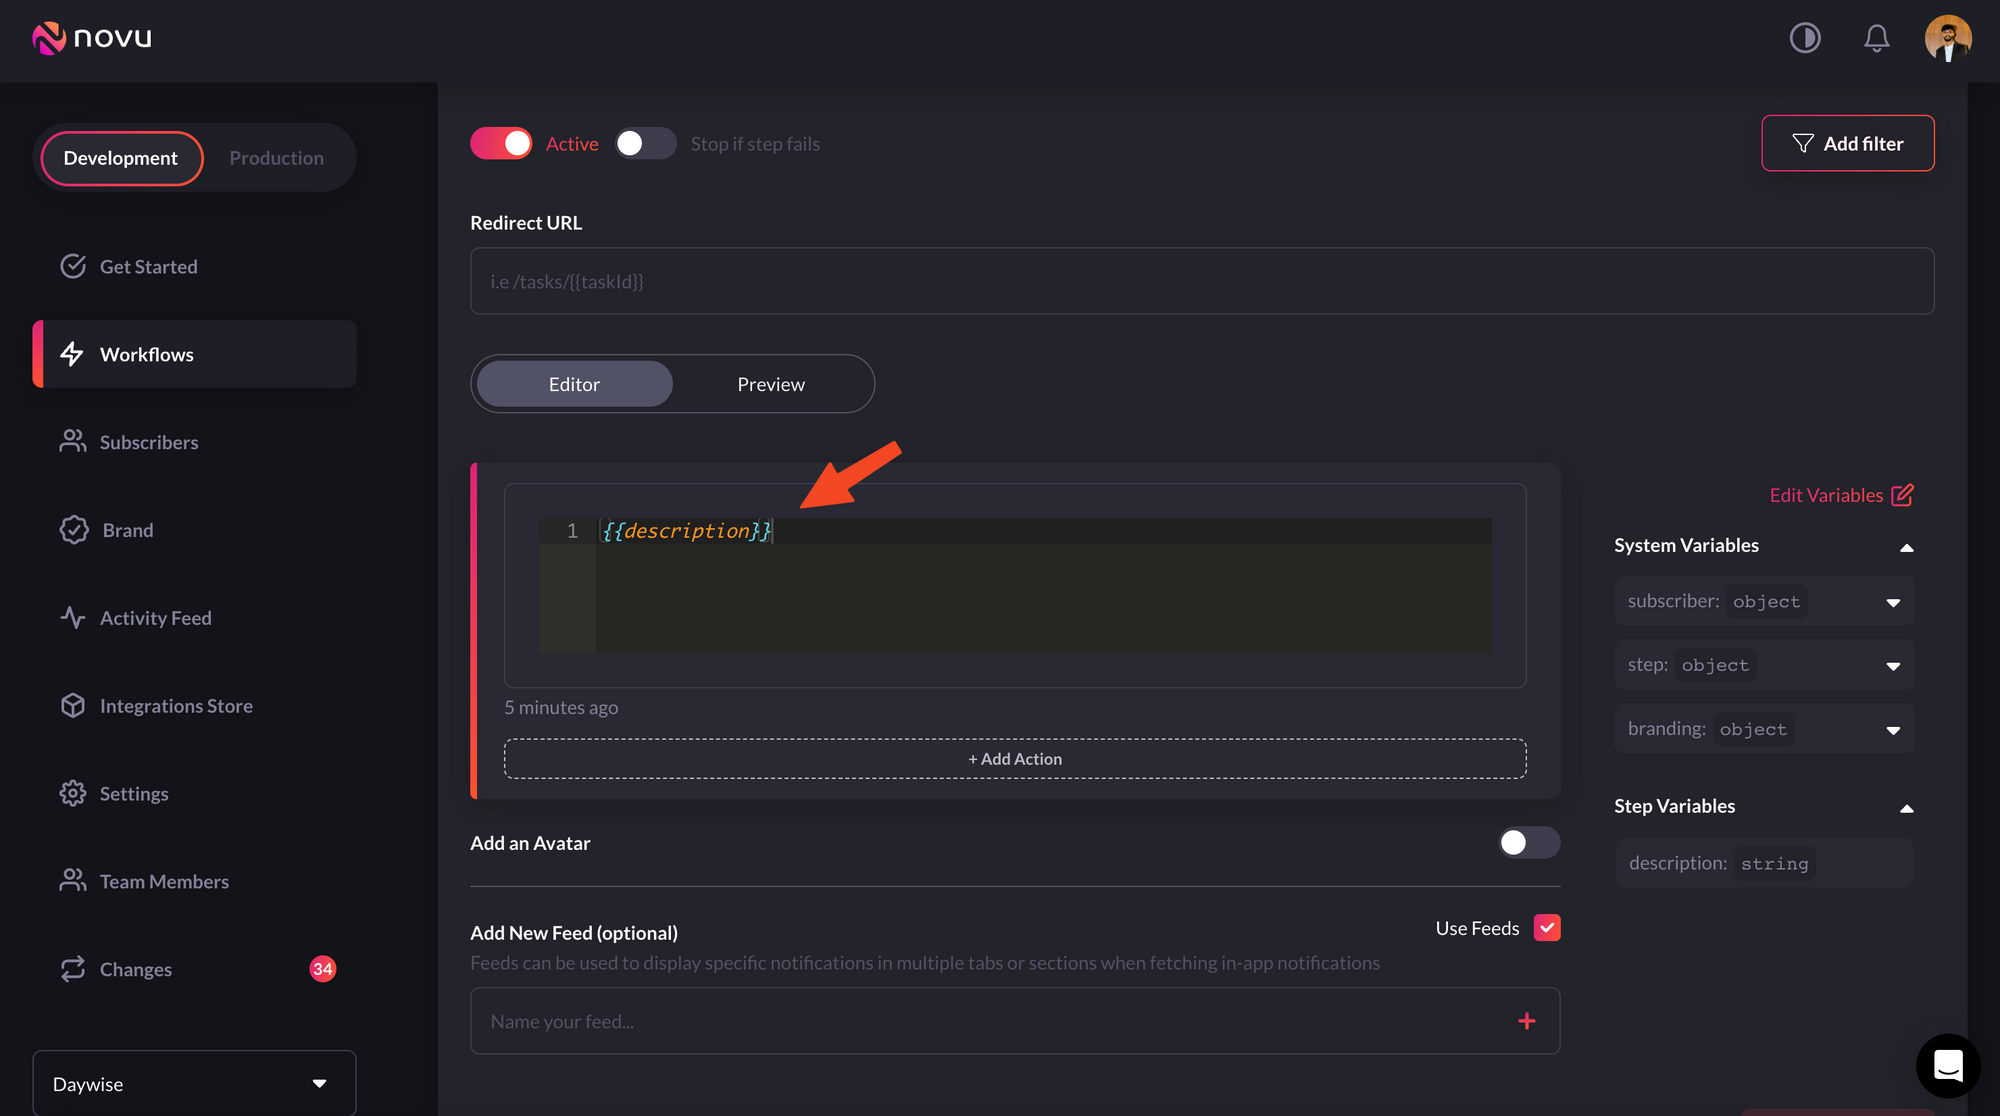
- Click on the recently added In-App channel and configure it according to your preferences. Once you’re done, click Update to save your configuration.

- 1-Preview: Shows you a glimpse of how each notification item will look like in the Notification Center UI.
- 2-Avatar: If turned on, each notification item will show the avatar of the subscriber.
- 3-Action: With this, you can add a primary and secondary call to action button to each notification item.
- 4-Notification Feeds: This displays a stream of specific notifications. You can have multiple feeds to show specific notifications in multiple tabs.
- 5-Redirect URL - This is the URL to which a subscriber can be directed when they click on a notification item.
- 6-Filter - This feature allows you to configure the criteria for delivering notifications. For instance, you can apply a filter based on a subscriber’s online status to send them an email if they were online within the last hour.
subscriberID, we’re ready to send notifications using Novu!
Using Novu in a vanilla JS app
We have already used the CDN to get the notification center component and we already have all the credentials that we need. To use it in an app, simply use thenotification-center-component in your html file as shown below.
script element at the bottom or move it all into a separate JavaScript file (don’t forger to link to the JavaScript file in this case).
Here’s an example of such an HTML file:
Code to trigger the notification
We can trigger a notification by simply executing the trigger code snippet we get from the Novu web dashboard. To get the snippet:- Go to Workflows in the left sidebar on Novu web dashboard.
- Select the workflow.
- Click the Get Snippet button on the top right.
Make sure you’re executing this code with the correct credentials.